Starfire Points Conversion
CDI
dayleedwards@rushpost.com
Discontinued - Use ZX Mark2 CDI Replacement
STARFIRE TWP-CDI for KAWASAKI H1 Points model,
all S Series, and KH250
Now the benefits of the STARFIRE Capacitor Discharge ignition system are available for triples with points!
The benefits are:
Sparkplugs last longer, operating at full efficiency throughout their life.
Easier starting because of a hotter spark, the STARFIRE TWP-CDI will operate even when battery level falls to 6 volts!
Points last forever, no pitting or burning.
Timing adjustment remains set for much longer periods.
If the CDI ever fails, it can simply be bypassed back to the original system to get you home.
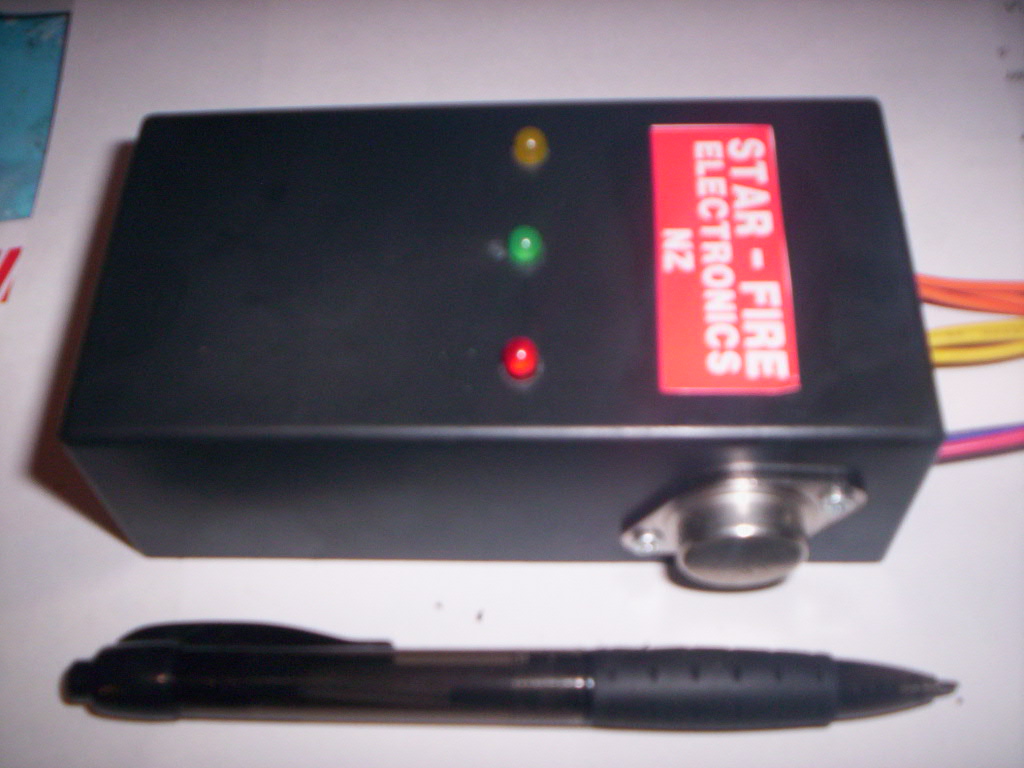
The STARFIRE TWP-CDI also has a built in and accurate timing light system, a separate red, green, and yellow LED indicators for each cylinder, making initial timing adjustment a breeze. No more messing with wires, ligthtbulbs and multimeters! The display also monitors the condition of the points making misfiring issues easy to fault find.
The TWP-CDI is easily wired between the existing points and coils but some minor wiring changes are required for full performance. Comes with complete instructions specific to each model, some electrical knowledge helpful.
FITTING INSTRUCTIONS for the STARFIRE
TWP model CDI.
The CDI unit should first be mounted , the
unit measures 5 inches, X 3 inches, X 2 inches, and will usually fit under
the seat in most bikes. There is no known good mounting location on the S
series without removing the airbox. DO NOT drill holes in the case of the STARFIRE CDI ,
the unit can be mounted using double sided tape to either the bike, or
alternatively can be fixed to a custom made bracket by the same means.
Vibration is an issue here, mostly the high order harmonics that crack
frames, and mountings, usually unfelt by the rider, but still making a bike
unpleasant to ride.
1) Identify the 3 wires connected from one terminal of each coil to the point assembly in the engine. These should be coloured GREEN, BLACK and BLUE.
DISCONNECT each wire from the coils ,
noting which coil is which colour, and reroute these toward the CDI unit.
2) Cut the 3 ORANGE wires to length from
the STARFIRE CDI unit, and connect these, using the correct terminals , one
wire to each vacated terminal on each coil.
3) Identify the RED wires connecting the
second terminal of each ignition coil to the 12 volt ignition feed. These
terminate in 2 double connectors. ADD a RED wire to this terminal block, and
run this back to the RED wire on the CDI.
4) Connect the BLACK wire of the CDI to a
firm ground.
5) Remove the 2 outer sparkplugs from the
engine, reconnect the high tension leads and lay them on the cylinder heads.
6) Switch on the ignition. The 3 timing
lights should be illuminated. Touch each YELLOW wire from the CDI unit, in
turn ,to a good ground. Each time, the associated light will flicker, and
one of the sparkplugs will fire. The YELLOW wire corresponding to the
correct cylinder can now be connected to the matching GREEN/BLUE/BLACK wire
removed in #1, again using the correct connectors. The YELLOW wires can be
shortened to make a neat job.
Your CDI conversion is now complete.
TO SET THE TIMING:
Each cylinder has its own set of points, and each set has two adjustments, the gap, and the advance/retard position. The gap is now relatively unimportant, the dwell angle, or time the points are closed now having no association with the ignition coil itself. The point gap can simply be set at the recommended figure and left. For extreme RPMs, the gap can be made very much smaller, this helping to combat points bounce, but cam wear will require more frequent adjustment.
Timing is done simply by turning on the ignition, moving the points breaker plate forward or back compared to crankshaft rotation, and watching the correct coloured indicator light for that cylinder, the light coming ON as the points OPEN. This also is when the spark occurs. It is usual to use a dial indicator down the spark plug hole to arrive at the correct setting.
To revert the system back to factory ignition, it is necessary only to disconnect the 3 yellow wires, the 3 orange wires, and reconnect the GREEN/BLACK/BLUE to their respective coils.
To gain absolute performance from the STARFIRE CDI, and at the expense of easily changing the system back to original, the 12 volt side of the ignition coils should be returned to earth/ground. This is best done by isolating the 12 volt feed from the first double connector, and connecting them to ground, the CDI then being the ONLY device connected to the ignition. The enclosed diagram with the unit will make this clear.